HPLC Method Development: A Step-by-Step Guide
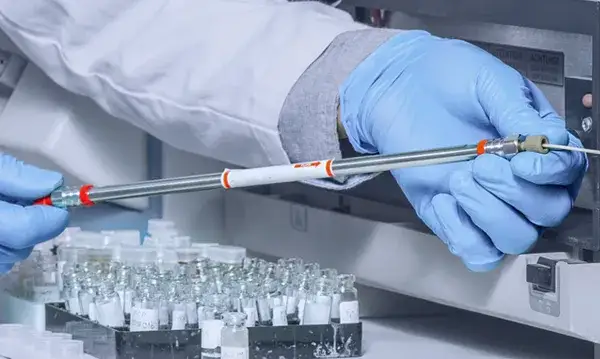
High-performance liquid chromatography (HPLC) method development is the systematic process of selecting chromatographic conditions, including the column, mobile phase, flow rate, temperature, and detection settings, so a method separates, detects, and quantifies target analytes reliably and reproducibly. A structured approach pays off in three concrete ways: it shortens the time spent chasing dead ends, produces a method that holds up under everyday lab conditions, and makes the eventual validation package easier to assemble because the groundwork already exists.
Researchers, analysts, and lab managers across pharma, biotech, environmental, food testing, and academic settings all face the same underlying challenge, which is matching the analyte’s chemistry to the right combination of column and conditions before optimization begins. This guide breaks that challenge into eight practical steps, each with the decision criteria that turn general theory into a working method on the bench.
What Is HPLC Method Development?
HPLC method development covers the full arc from designing a separation to optimizing it, since resolution, peak shape, and run time rarely land in an acceptable range on the first attempt. Optimization sits inside this process as an active, iterative stage, while validation is a distinct, later step that formally demonstrates the finished method meets defined performance criteria for its intended purpose, a topic Step 8 covers in detail. Knowing how to develop an HPLC method starts with treating these as connected but separate stages, each with its own goals and its own evidence requirements.
The HPLC Method Development Steps
Building a method one deliberate decision at a time keeps the process organized and limits wasted instrument time. The HPLC method development steps below walk through that decision chain from goal-setting to final validation, and each answers a question that shapes everything downstream.
Step 1: Define the Method Goal and Requirements
Start by writing down exactly what the method needs to accomplish before touching the instrument. A one-factor-at-a-time approach, where a chemist adjusts a single variable and reruns the separation, runs into trouble once several analyte properties and instrument limitations interact at once. Defining accuracy and precision targets, confirming which reference standards exist, and setting the number of analytes the method must resolve gives every later decision a clear benchmark.
Step 2: Understand the Sample and Analytes
Review the physicochemical profile of each analyte, including molecular weight, polarity, ionization state, and solubility, because these properties dictate which separation mode and stationary phase chemistry will work. An ester functional group or a compound with two distinct pKa values, for example, calls for particular attention to pH during mobile phase selection, since ionization state shifts retention sharply across even a narrow pH window. Matrix complexity matters too: a clean reference standard and a biological or environmental sample rarely need the same amount of cleanup before injection.
Step 3: Select the Separation Mode and Column
Once the analyte properties are clear, match them to a separation mode and a starting HPLC column chemistry. Reversed-phase (RP) HPLC remains the default choice for small molecules, largely because it offers predictable retention across a wide range of non-polar to weakly polar compounds.
Very polar compounds that resist retention under RP conditions typically move to hydrophilic interaction liquid chromatography (HILIC), a complementary separation mode covered in the table below.
Polar analytes that show weak or no retention on a reversed-phase column are a common trigger for switching modes entirely. HILIC pairs a hydrophilic stationary phase with a mostly organic mobile phase, which builds a water-enriched layer near the particle surface that retains polar solutes far more effectively than a standard RP column can manage. Comparing HILIC vs. reversed phase early in development saves real time whenever a compound’s polarity sits near the boundary between the two modes.
Step 4: Choose and Optimize the Mobile Phase
The mobile phase composition, pH, and buffer strength shape retention, selectivity, and peak shape more than almost any other variable in the method. A response surface study on two structurally distinct drugs modeled resolution and peak symmetry against organic solvent ratio, buffer concentration, and pH together, and found the organic ratio carried the strongest influence on resolution, with buffer strength and pH acting as secondary but still meaningful factors.
The optimized conditions in that study settled on 65% aqueous ammonium acetate buffer at pH 3.5 against 35% methanol, chosen specifically because it protected peak symmetry rather than chasing resolution alone. Testing pH, buffer type, and organic ratio as a set, rather than one variable at a time, tends to reveal the genuine optimum faster.
Step 5: Select Conditions Amenable to the Detector Available
In most labs, the detector is fixed by whatever equipment already sits on the bench, so this step is less about choosing hardware and more about picking chromatographic conditions the detector can work with. That covers selecting mobile phases and additives the detector tolerates, tuning wavelength or excitation and emission settings where relevant, and weighing detector sensitivity against the analytical requirement at hand.
Fluorescence detection illustrates the sensitivity gap clearly. In one bioanalytical method, the signal-to-noise response for a UV-active drug rose roughly 80-fold when the method switched from UV to fluorescence detection, a difference attributable to the lower background and higher specificity that the fluorescence measurements provide.
This gain matters most for trace-level work in complex matrices, where UV alone struggles to separate a true signal from matrix noise. MS sits at the other end of the compatibility question, since it demands additives that are volatile, which is why ammonium acetate and similar buffers show up so often in LC-MS methods.
Step 6: Set Initial Conditions and Run the First Separation
With the mode, column, mobile phase, and detector settings roughed out, run a scouting separation (often a gradient method) to see when the analytes truly elute relative to expectations.
A first-pass run rarely produces a publication-ready chromatogram, but the retention order and peak shapes it reveals tell you exactly which variable to push next.
Step 7: Optimize Resolution, Speed, and Robustness
Once analytes elute in a sensible order, fine-tune the separation for resolution between critical peak pairs, overall run time, and tolerance to small day-to-day variations. Robustness testing introduces small, deliberate changes to flow rate, pH, and mobile phase composition to check whether the method stays stable under routine variability.
One method development study reported a relative standard deviation under 2% across these parameter shifts, with no meaningful change in the chromatographic profile, and treated that consistency as direct evidence the method could handle everyday use. System suitability metrics such as resolution, tailing factor, and theoretical plate count give a quantitative way to confirm the separation meets its intended purpose before formal validation.
Step 8: Verify and Validate the Method
Method verification confirms that a previously validated or compendial method performs as expected under the specific laboratory conditions where it will run, whereas validation demonstrates that a newly optimized method consistently meets predefined performance criteria for its intended use. The International Council for Harmonisation (ICH) Q2(R2) guideline states that the objective of validating an analytical procedure is to demonstrate the procedure is fit for its intended purpose, and it notes that robustness is typically evaluated during development, before the formal validation study begins.
That timing detail matters, since robustness data gathered in Step 7 can often carry forward into the validation package rather than requiring a repeat experiment. The depth of validation required scales with purpose, so an early-phase screening method and a commercial release method rarely call for the same level of scrutiny, a distinction central to HPLC method development and validation planning.
Common HPLC Method Development Problems
A validated method rarely stays trouble-free forever, and even a carefully planned one runs into predictable snags once it moves into daily use. Recognizing the pattern early saves troubleshooting time.
- Poor Peak Shape or Tailing: Residual silanol groups on the silica surface most often cause tailing in reversed-phase separations, so adjusting mobile phase pH or switching to an end-capped phase frequently resolves it.
- Low Resolution between Peaks: Insufficient selectivity or column efficiency is the usual culprit, and a change in organic modifier, gradient slope, or column chemistry can restore separation.
- High Retention Times: Too much aqueous mobile phase in a reversed-phase method, or an analyte that needs a different separation mode, both point toward this problem.
- Poor Reproducibility: Inadequate column equilibration, unstable buffers, or inconsistent temperature control commonly drive this issue, and tighter environmental controls generally fix it.
- No Retention of Polar Analytes: A strong sign the separation mode is mismatched, and switching to HILIC frequently restores the retention that reversed-phase conditions could not provide.
FAQs on HPLC Method Development
How do you choose a column for HPLC method development?
Match the analyte’s polarity, ionization state, and molecular size to a separation mode first, then narrow the column choice within that mode. Screening two or three candidate chemistries against the analyte early often reveals which one gives the cleanest starting separation.
Should I use isocratic or gradient elution?
Isocratic elution suits simple mixtures with a narrow polarity range and keeps validation simpler later. Gradient elution suits complex samples spanning a wide polarity range, since it can bring both early and late peaks off the column within a reasonable runtime.
What flow rate and column should I start with?
A flow rate near 1 mL/min with a 4.6 mm ID column packed with 3.5–5 μm particles works as a sensible default for most reversed-phase separations. Adjust flow rate for backpressure and resolution from there, and consider a shorter column when development speed matters more than maximum resolution.
How do you improve resolution in an HPLC method?
Mobile phase composition, pH, and organic solvent ratio usually deliver the biggest resolution gains, since these variables act directly on selectivity. Column temperature, gradient slope, and stationary phase chemistry offer additional levers once mobile phase adjustments reach their limit.